As much as I love working on a project - coming to an end is great as well ✌✌✌

Taking photos and video shots
Background:
This was always meant to be a winter house and the snow around here came just at the right time (gone again since yesterday)! For the photo shooting I wanted some of the pix to be done outside, whilst others I did in the warm inside using a poster backdrop I photographed and had printed.
Equipment:
All my pictures and videos are taken with the iphone6. Most shots and definitely all videos are taken holding the phone horizontally! Nothing worse than having black voids left/right of the video picture.

- For hard-to-get-to places I use a 360° blue-tooth selfie stick. The 360° the vital feature because I really want the phone to swivel the way I need it.
- The tripod ensures really sharp takes.
- For the videos I need to be in a non-cramped position and have a steady hand. A video stabilizer like DJI Osmo would come in handy for those who are prepared to spend money.
Taking photos:
Select and enhance shots:
Because I am not all that good (yet..) with Adobe Photoshop Elements, I perfer to use the Mac Photo program to enhance - where necessary.
But before I get to that I have to select!!! I first sort them all into room categories. And then mark those worthwhile looking at again. So it goes... until I am down to a good dozen shots per room.
Then the critical eye becomes extremely critial:
- Everything straight? No? Grr... need to re-take the shot
- Specks on the floor? Easy - use the little fix-it plaster in Mac Photos
- Is the background realistic? No? Grr... need to re-take the shot
- Is there glare? ... off into the delete baskets and take a new shot
- is the focus where I want it do be? Adobe Elements can help a bit ...
- And it is bright enough? Up to a certain extent, Mac Photos can take care of that...
Assembling the video from photos and video takes:
I do this with iMovie on my Mac. I use this since many years and the best tutorials I found are Gary's Macmost website.

I use various features of the program, such a stabilizing the video take, adjusting length of take, adjusting exposure, etc.
The photos I use (only horizontal takes!) become alive by using Ken Burns. It allows to put the focus to where is should be. iMovie does this automatically - but my choice is often different ;-)
So, this is how I finalize a model. Thought you might be interested in this.
My next blog will give you the links to the videos of this house.
Wintery and christmasy greetings from Switzerland
Marion
BTW: if anyone ever needs one of this large posters just let me know and I can either send you the file or the printed poster (on loan). These are the ones I have..


Taking photos and video shots
Background:
This was always meant to be a winter house and the snow around here came just at the right time (gone again since yesterday)! For the photo shooting I wanted some of the pix to be done outside, whilst others I did in the warm inside using a poster backdrop I photographed and had printed.
 |
| Background poster 60cm high |
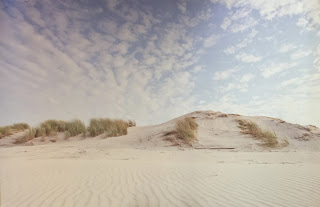
 |
| Outside shot |
All my pictures and videos are taken with the iphone6. Most shots and definitely all videos are taken holding the phone horizontally! Nothing worse than having black voids left/right of the video picture.

- For hard-to-get-to places I use a 360° blue-tooth selfie stick. The 360° the vital feature because I really want the phone to swivel the way I need it.
- The tripod ensures really sharp takes.
- For the videos I need to be in a non-cramped position and have a steady hand. A video stabilizer like DJI Osmo would come in handy for those who are prepared to spend money.
Taking photos:
Avoiding glare and mirror effect in the large windows of the model, is always the biggest problem. That's why I sometimes close all shutters and work with borrowed photographer lamps. Not my favorite - I prefer natural daylight. But then again, it should not be too bright..
Photo shooting is a lengthy process because I try different light situations in a south/east facing room (am, pm, artificial...) to be able to select the best. |
| A little cramped in my 'village'... |
Select and enhance shots:
Because I am not all that good (yet..) with Adobe Photoshop Elements, I perfer to use the Mac Photo program to enhance - where necessary.
But before I get to that I have to select!!! I first sort them all into room categories. And then mark those worthwhile looking at again. So it goes... until I am down to a good dozen shots per room.
Then the critical eye becomes extremely critial:
- Everything straight? No? Grr... need to re-take the shot
- Specks on the floor? Easy - use the little fix-it plaster in Mac Photos
- Is the background realistic? No? Grr... need to re-take the shot
- Is there glare? ... off into the delete baskets and take a new shot
- is the focus where I want it do be? Adobe Elements can help a bit ...
- And it is bright enough? Up to a certain extent, Mac Photos can take care of that...
Assembling the video from photos and video takes:
I do this with iMovie on my Mac. I use this since many years and the best tutorials I found are Gary's Macmost website.

I use various features of the program, such a stabilizing the video take, adjusting length of take, adjusting exposure, etc.
The photos I use (only horizontal takes!) become alive by using Ken Burns. It allows to put the focus to where is should be. iMovie does this automatically - but my choice is often different ;-)
So, this is how I finalize a model. Thought you might be interested in this.
My next blog will give you the links to the videos of this house.
Wintery and christmasy greetings from Switzerland
Marion
BTW: if anyone ever needs one of this large posters just let me know and I can either send you the file or the printed poster (on loan). These are the ones I have..


No comments:
Post a Comment